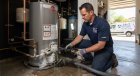
Water Heater Leaking Top vs Bottom: Causes & Fixes
Water heater leaking from the top or bottom? Learn the crucial differences, diagnostic steps, repair costs, and when to call a pro in our complete guide.

Why Is My Water Heater Leaking from the Top vs. the Bottom?
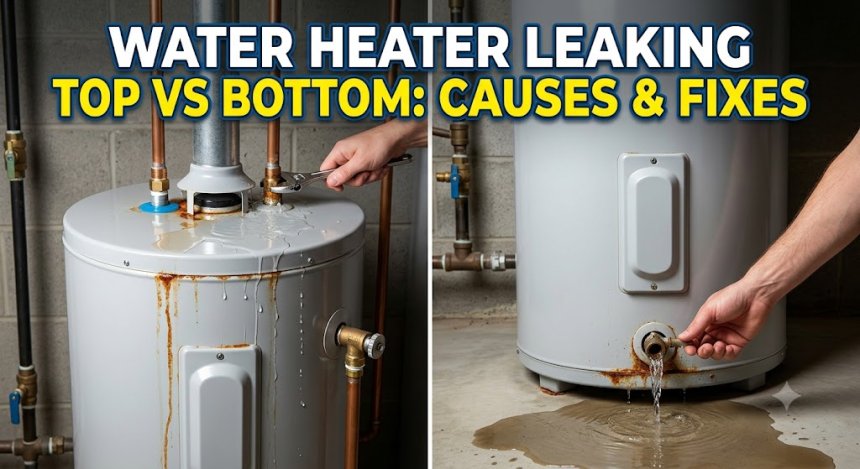
A water heater leaking from the top usually indicates repairable pipe connections, loose dielectric nipples, or a failing anode rod, whereas a leak from the bottom typically signals a damaged drain valve, thermal expansion pressure release, or an irreparable, corroded steel tank requiring immediate replacement.
Top vs. Bottom Leaks: The Critical Mechanics and Physics
Understanding where water escapes your heating system reveals whether you are facing a simple plumbing fix or a catastrophic tank failure.
                  WATER HEATER LEAK DIAGNOSTIC MAP
                  ────────────────────────────────
     TOP LEAKS (Often Repairable)       BOTTOM LEAKS (Often Replacement)
     ┌────────────────────────┐         ┌────────────────────────┐
     │ • Cold Inlet Connection│         │ • Inner Tank Corrosion │
     │ • Hot Outlet Nipple    │         │ • Drain Valve Leak     │
     │ • Anode Rod Port       │         │ • Heating Element Seal │
     │ • Expansion Tank Joint │         │ • T&P Discharge Pipe   │
     └────────────────────────┘         └────────────────────────┘
1. Top Leaks: Connection Failures and Galvanic Corrosion
Water entering and leaving the tank relies on threaded mechanical joints at the top dome.
-
Galvanic Corrosion: When two dissimilar metals (like steel tank nipples and copper water lines) touch without a dielectric union, an electrochemical reaction occurs. Electric currents pass between the metals, corroding the steel threads and causing localized water weeping.
-
Thermal Expansion Strain: As water heats from 50°F to 120°F, it expands by roughly 2–3%. In a closed plumbing system without an operational thermal expansion tank, this expansion creates high hydraulic pressure spikes (over 100 PSI), forcing water out through pipe connections, flex lines, or the anode rod port threads.
2. Bottom Leaks: Internal Rust and Hydrostatic Stress
Leaks pooling beneath the base of your tank are far more dangerous because they usually originate inside the insulated jacket.
-
Porcelain Enamel Fracture & Rust: The inside of a steel water heater tank is lined with a thin porcelain enamel glass coating. Over years of heating cycles, thermal stress cracks this glass. Dissolved oxygen in municipal tap water reaches the raw steel, causing deep pitting rust until water penetrates through the heavy insulation layer and drips onto the floor.
-
Sediment Calcification Traps: Heavy sediment resting at the bottom insulates heat, causing the bottom steel head to overheat, warp, and weaken welded structural seams.
Leak Comparison: Top vs. Bottom Causes at a Glance
| Leak Location | Most Common Cause | Relative Urgency | DIY Repair Potential | Typical Outcome |
| Top: Inlet/Outlet Lines | Loose fittings, failed pipe tape | Moderate | High | Tighten / Replace Flex Line |
| Top: Anode Rod Cap | Worn threads, loose seal | Low – Moderate | Moderate | Thread Sealant / Replace Rod |
| Top: Temperature & Pressure Valve | High pressure, thermal expansion | High | Low | Replace Valve / Add Expansion Tank |
| Bottom: Plastic Drain Valve | Cross-threaded stem, sediment clog | Moderate | High | Upgrade to Brass Ball Valve |
| Bottom: Electric Element Gasket | Degraded O-ring seal | Moderate | Moderate | Replace Gasket / Element |
| Bottom: Tank Base Seams | Rusted steel, cracked lining | Critical | None | Full Unit Replacement |
Safe DIY Diagnostics vs. Professional Plumbing Scope
It is vital to distinguish between a loose pipe connection you can tighten yourself and a high-risk scenario involving gas or high-voltage electric lines.
| Diagnostic or Repair Scenario | Safe for DIY? | Requires a Licensed Professional |
| Tightening Loose Water Supply Flex Lines | Yes | Optional |
| Replacing a Leaky Plastic Drain Valve | Moderate | Recommended |
| Testing Temperature & Pressure (T&P) Valve | Yes | Optional |
| Replacing Electric Heating Element Gaskets | Moderate | Recommended |
| Replacing Internal Tank Shell / Rusted Seams | No | Replacement Required |
| Installing / Pre-Charging Thermal Expansion Tanks | No | Yes (Code Compliance) |
| Gas Control Valve or Exhaust Flue Diagnostics | No | Yes (Safety Hazard) |
Step-by-Step DIY Guide: Emergency Emergency Shut-Off & Leak Inspection
If you spot water pooling around or on top of your water heater, follow these emergency steps to isolate the unit and limit water damage to your property.
       EMERGENCY SHUT-OFF PROCEDURE
       ────────────────────────────
 [Step 1: Shut Off Fuel/Electrical Supply]
                     │
                     ▼
 [Step 2: Close Main Cold Water Valve]
                     │
                     ▼
 [Step 3: Relieve Water Line Pressure]
                     │
                     ▼
 [Step 4: Wipe Dry & Trace Leak Source]
Safety Equipment Needed:
-
Flashlight
-
Dry towels or paper towels
-
Non-contact voltage tester (for electric units)
-
Heavy leather gloves
Step 1: Turn Off the Power or Gas Supply
-
Electric Models: Go to your main electrical panel and flip the double-pole circuit breaker assigned to the water heater to the OFF position.
-
Gas Models: Rotate the gas control valve knob on the front bottom of the tank to PILOT or OFF. Turn off the dedicated gas shut-off valve on the supply line.
Step 2: Shut Off the Cold Water Supply Valve
Locate the cold water pipe entering the top of the tank (usually identified by a blue handle or cap). Turn the valve handle clockwise (if a gate valve) or 90 degrees (if a lever ball valve) to stop incoming water pressure.
Step 3: Relieve Household Hydraulic Pressure
Open a hot water fixture on the floor above your water heater. This relieves residual line pressure and prevents vacuum siphonage from pulling remaining water through damaged joints.
Step 4: Dry the Tank and Trace the Leak Point
Wipe down top connections, insulation jackets, and the floor surrounding the unit. Use a flashlight to observe where fresh droplets emerge:
-
Top-down flow: Water dripping down insulation slits usually originates from top nipples, flex connectors, or T&P valves.
-
Bottom-up pooling: Water seeping directly out from underneath the metal base wrapper without any wetness higher up indicates an internal tank rupture.
Dealing with an active water leak or flooded basement? Stop water damage before it spreads. Call the emergency response team at 24x7 American Plumber at
762-383-0288 for immediate assistance.
Pro "Hidden Tips" for Preventing Water Heater Leaks
-
Test Expansion Tank Pressure Annually: Thermal expansion tanks contain a rubber bladder pre-charged with air. When the bladder fails, water fills the expansion chamber completely ("waterlogging"), causing system pressure to spike above 100 PSI every time water heats up. This excess pressure forces water out through seals and T&P valves.
-
Install a Smart Water Leak Detector & Auto Shut-off Valve: Placing a low-cost electronic water sensor inside the drain pan under your tank can automatically trigger a motorized valve to shut off incoming water the second a leak is detected, saving thousands in floor repairs.
-
Never Overtighten Flex Connectors: Stainless steel corrugated flex lines use rubber washers to form a water-tight seal. Overtightening these connections during installation squashes and cuts the rubber gasket, leading to micro-leaks 6 to 12 months later.
Plumber Work: How Master Plumbers Fix Leaks & Replace Tanks
When a master plumber arrives at your home for a leaking water heater, they do not just replace parts—they perform comprehensive system evaluations:
┌─────────────────────────────────────────────────────────────────┐
|               PROFESSIONAL LEAK EVALUATION PROTOCOL             |
├─────────────────────────────────────────────────────────────────┤
| 1. Static Pressure Testing: Gauge pressure check at hose bib    |
|    to verify incoming water pressure is under 80 PSI limit.     |
|                                                                 |
| 2. Thermal Expansion Inspection: Verify air pressure charge in  |
|    expansion tank matches static house water pressure.          |
|                                                                 |
| 3. Dielectric Union Verification: Inspect copper-to-steel joints|
|    for signs of galvanic electrolysis and thread corrosion.     |
|                                                                 |
| 4. Endoscopic Inspection: Insert camera into element ports to   |
|    evaluate internal porcelain glass lining integrity.          |
└─────────────────────────────────────────────────────────────────┘
If the internal glass lining has fractured and the outer steel shell is compromised, the plumber will drain the system safely using commercial pumping equipment, disconnect gas/electrical and venting systems, and install a code-compliant unit complete with new drip pans, expansion tanks, and safety shut-offs.
Equipment Lifespan and Industry Cost Context
Knowing typical equipment lifespans and realistic repair vs. replacement costs helps you make informed financial decisions.
                  EXPECTED UNIT LONGEVITY
 ─────────────────────────────────────────────────────────
 Standard Tank Water Heater    : 8 - 12 Years
 Tankless On-Demand System     : 15 - 20 Years
 Commercial Grade Storage Tank : 6 - 10 Years
Estimated US Industry Costs (Parts and Labor):
-
Top Pipe Connection / Dielectric Nipple Repair: $150 – $300
-
T&P Relief Valve / Expansion Tank Replacement: $250 – $500
-
Electric Heating Element & Gasket Replacement: $200 – $425
-
Drain Valve Replacement (Brass Upgrade): $175 – $325
-
Complete System Replacement (Tank-Style): $1,200 – $2,800
-
Tank-to-Tankless System Upgrade: $2,500 – $4,500+
Unsure if your leaking unit can be saved? Call
762-383-0288 to speak with the experienced team at 24x7 American Plumber. We provide honest, upfront assessments without high-pressure sales tactics.
When to Call the Pros
Some water heater leak scenarios pose serious health, fire, or property damage risks and require immediate professional attention:
-
Water Gushing Rapidly from the Base: Signals a full structural breach or total seam failure; requires emergency shutdown and extraction.
-
Leaking Water Near Electrical Controls or Panels: Water coming into contact with high-voltage thermostats or elements creates an immediate electrocution and fire hazard.
-
Continuous Discharge from the T&P Relief Valve: Points to dangerous over-pressurization or excessive water temperatures above 210°F.
-
Corroded Gas Line Connection Points: Any wetness near gas valves or supply lines can cause rapid fitting corrosion and gas leaks.
Frequently Asked Questions
Is a leaking water heater an immediate emergency?
Yes. Even a minor trickle can quickly turn into a total tank rupture, spilling 40 to 80 gallons of scalding water into your home in minutes. Shut off the cold water supply valve and power/gas source immediately upon discovering a leak.
Can a water heater leaking from the bottom be repaired?
If the leak comes from a threaded drain valve or an electric element gasket near the bottom, it can usually be repaired. However, if water is leaking directly from the steel tank shell underneath the insulation, the inner lining has corroded through, and the entire unit must be replaced.
Why is my water heater leaking from the top overflow pipe?
The pipe running down the side of your tank connects to the Temperature and Pressure (T&P) Relief Valve. If water is dripping from this pipe, either your water pressure is too high (exceeding 150 PSI), the water temperature is dangerously hot, or the valve itself has failed due to sediment buildup.
How long will a water heater last after it starts leaking?
A water heater leaking from a cracked internal tank shell can fail catastrophically within hours or days. Once the inner core is breached, structural failure is unpredictable, making immediate replacement essential.
Stop Water Heater Leaks with 24x7 American Plumber
Don't let a leaking water heater damage your floors or disrupt your routine. The licensed experts at 24x7 American Plumber offer 24/7 emergency leak response, professional repairs, and code-compliant installations across the USA.
-
Call Us 24/7:
762-383-0288 -
Visit Our Website:
24x7americanplumber.com -
Our Promise: Fast Response, Upfront Pricing, and Dependable Workmanship